


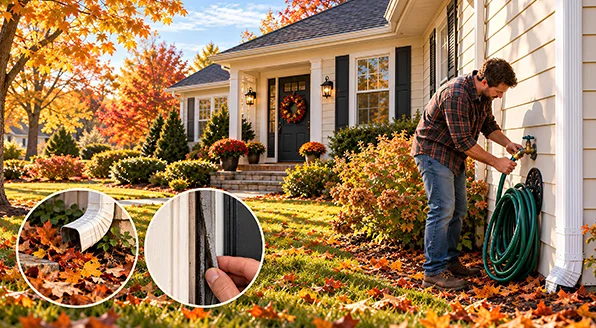
When Should You Start Fall Home Maintenance?
Plan your fall home maintenance checklist around your first freeze, not a date on the calendar. In the northern states and most of Canada, that can be late September. Along the Gulf Coast it might not come until December. Pipes in unheated spots like garages and crawlspaces are most at risk once it drops to about 20 °F (−7 °C) outside, so get the outdoor water jobs done before that first cold snap. Short on time? If you only have one weekend, do these first: gutters and downspouts (Jobs 1 and 3), outdoor faucets and pipes (Jobs 4 and 5), and the furnace and alarms (Jobs 12, 13 and 15). The rest can wait a few weeks. The exception is a roof leak or a blocked vent, which shouldn’t wait for the first storm.How Do You Prevent Water Damage Before Winter?
Start by getting water away from your house and out of any pipes that could freeze. Ice dams, wet basements and burst pipes all begin with water sitting in the wrong place when the temperature drops.1. Clear the Gutters After Most Leaves Have Dropped

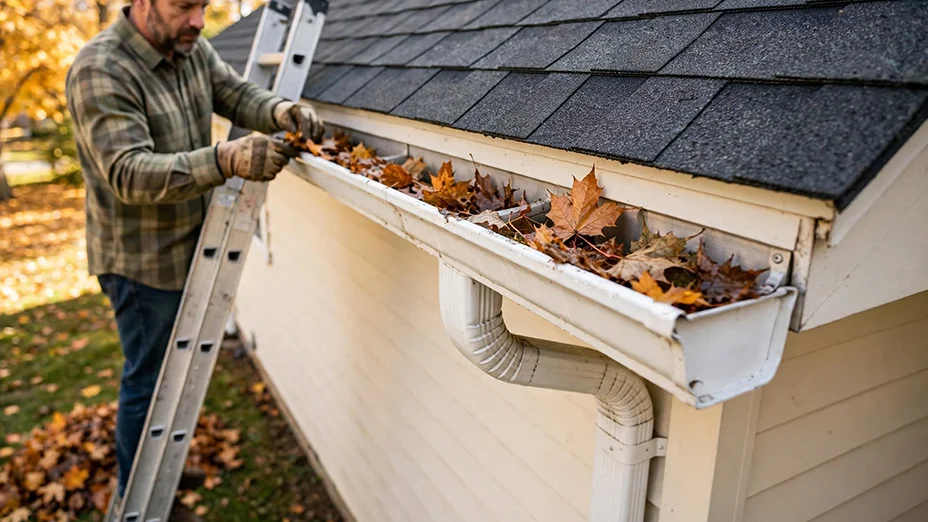
Wait until the trees near your house are mostly bare, then clean the gutters. Pay extra attention to the outlet, the hole where the gutter drains into the downspout. Leaves pack in there, and a gutter that looks clean from the top can still overflow because of it.
When you’re done, run a garden hose at the far end and watch the water. It should flow steadily toward the downspout. If water sits in the middle, a hanger has probably come loose and the gutter is sagging. Re-fasten it before winter, or that low spot will fill with ice.
Gutter guards cut down on cleaning, but they don’t end it. Pine needles and fine debris still get through. Our gutter cleaning tools guide covers the scoops and wands that make the job faster.
Measure first: Measure across the top of your gutter. Most houses have 5-inch (127 mm) gutters, and bigger roofs often have 6-inch (152 mm). Guards are sized to fit, so a 5-inch guard won’t work on a 6-inch gutter.
2. Look for Leaks at the Gutter Seams
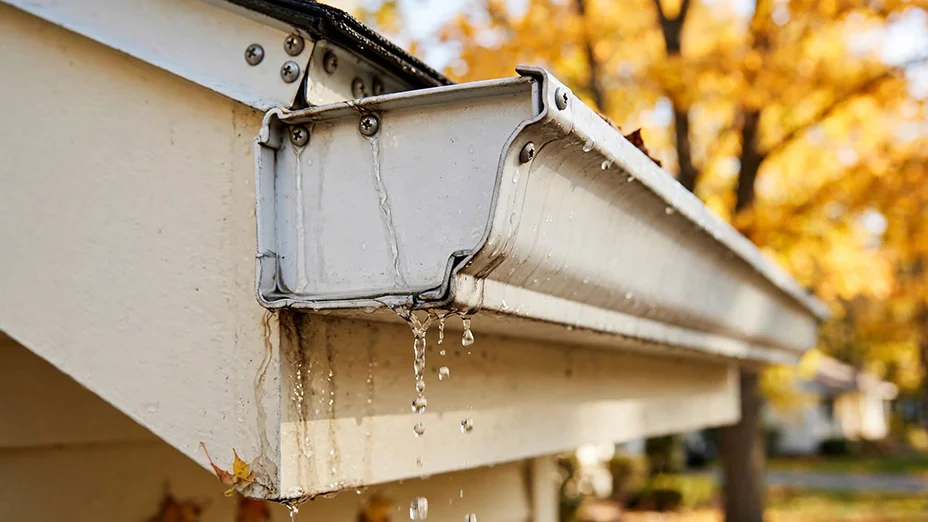
Leave the hose running and walk along the gutter, watching the corners, joints and end caps. A small drip doesn’t seem like much now, but in January it turns into an icicle, and over a few winters it can rot the wood behind the gutter.
To fix a leak, scrape out the old sealant, scrub the joint clean and let it dry completely. Then apply a gutter sealant made for your gutter material. Most sealants need a dry day around 40 °F (4 °C) or warmer, so pick a mild afternoon. If a seam keeps leaking after you’ve sealed it, a loose hanger is probably letting the gutter flex. Tighten the hanger first, then reseal.
Measure first: Check what your gutters are made of (aluminum, vinyl or steel) and make sure the sealant label lists it.
3. Make Sure Downspouts Drain Away From the House
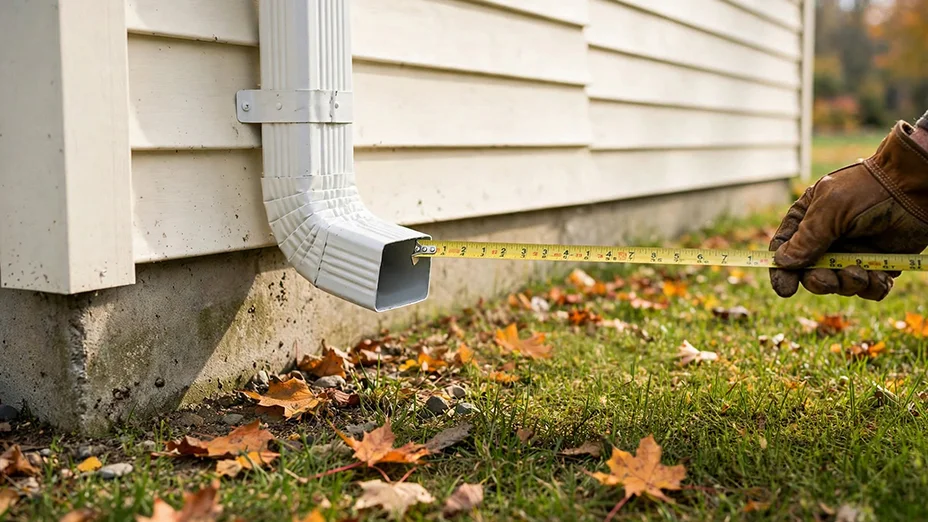
Look at where each downspout lets the water out. It should land at least 4 to 6 feet (1.2–1.8 m) from your foundation, on ground that slopes away from the house. Water dumped right at the corner soaks into the foundation. It can also freeze across a walkway and turn it into a slip hazard.
If you have a sump pump, test it while the hose is out. Pour a bucket or two of water into the pit. The pump should kick on, empty the pit and shut off by itself. Then follow the discharge pipe outside, because a pipe that ends in a low spot can freeze solid in January, just when you need it.
Measure first: Measure the end of your downspout. Most are either 2 × 3 inches (51 × 76 mm) or 3 × 4 inches (76 × 102 mm), and downspout extensions are made to fit one size or the other.
4. Disconnect Hoses and Drain Outdoor Faucets
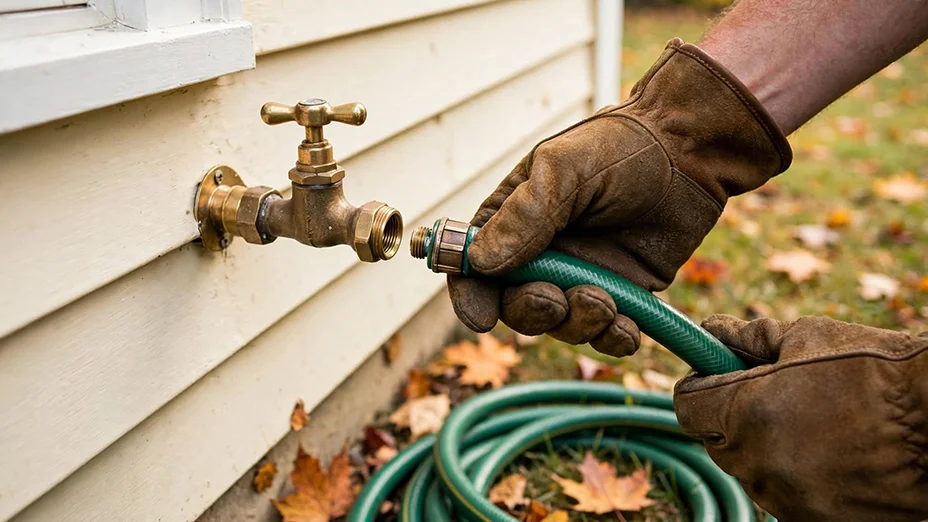
Take every hose off its outdoor faucet, even if you have frost-free faucets. Frost-free faucets shut off water inside the warm part of the wall, but they only drain if nothing is attached. Leave a hose on and the trapped water freezes and splits the pipe inside the wall. Most people don’t find out until spring, when they turn the faucet on and water runs into the basement.
- Remove every hose, splitter and hose timer.
- If you have a regular outdoor faucet (not frost-free), find its shutoff valve inside. It’s usually in the basement or crawlspace, near where the pipe goes through the wall. Turn it off.
- Open the outdoor faucet so the leftover water drains out. Many indoor shutoffs also have a small cap on the side. Open it to let the last bit of water out, then close it again.
- Put an insulated faucet cover on after you drain the faucet. It helps hold in heat from the wall, but it won’t protect a faucet that still has water in it.
Measure first: Measure the faucet, including the handle and the plate against the wall, and check it against the size listed for the cover.
5. Wrap Pipes in Cold Spots
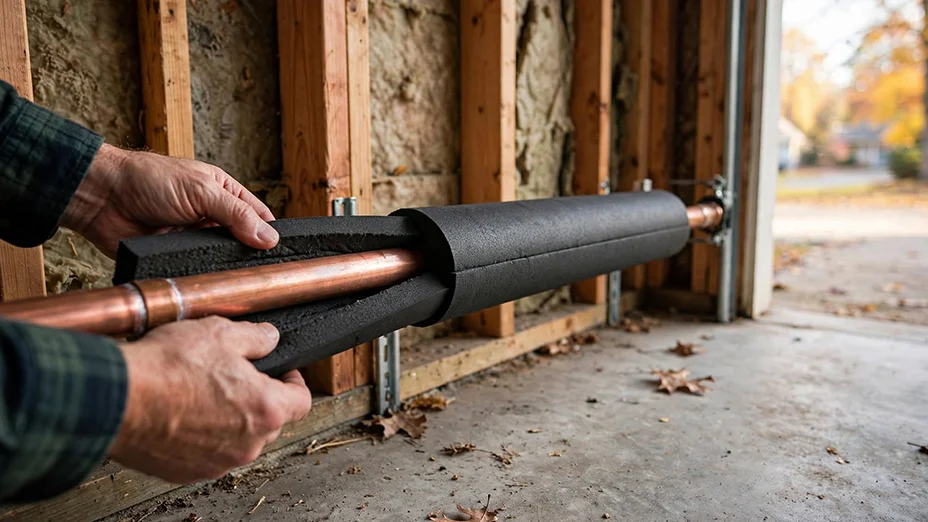
Wrap any water pipe that runs through a cold space: an unheated garage, a crawlspace, the attic, or the cabinet under a sink on an outside wall. Pipes usually freeze at one short, drafty stretch, often near a garage door or a foundation vent.
The usual mistake is buying pipe insulation by the pipe’s nominal size, which is the size it’s sold as. A “½-inch” copper or PEX pipe actually measures about ⅝ inch (16 mm) across the outside, and a “¾-inch” pipe measures about ⅞ inch (22 mm). Foam that’s too big leaves a gap that lets cold air in. Wrap a tape measure around the pipe, or hold a ruler across it, and buy insulation to fit what you measured.
If a pipe has frozen before, foam alone may not be enough. Heat cable can help. Use one that’s UL- or CSA-listed, plug it into a GFCI outlet, and follow the instructions exactly, which includes never running it inside a wall. Then find where the cold air is coming from, such as an open vent or a gap around the pipe, and seal it.
Measure first: Note the pipe’s outside measurement, what it’s made of and how many feet are exposed.
6. Check the Roof From the Ground

How Do You Seal Drafts Around Doors and Windows?
Once water is taken care of, the next part of your fall home maintenance checklist is stopping cold air from getting in. Work from the outside in: caulk first, then door seals, then windows. For more on where drafts usually hide, see our home insulation and weatherproofing guide.7. Replace Cracked Exterior Caulk
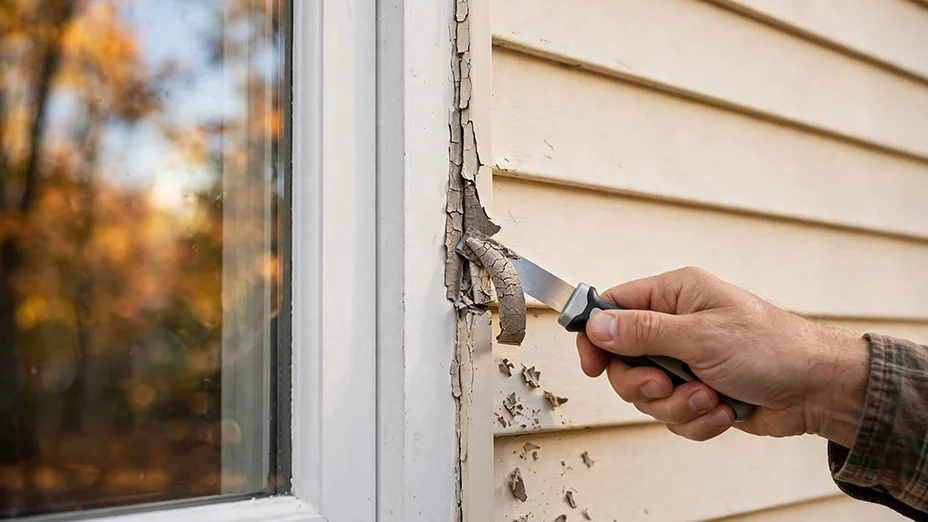
Walk around the house and look at the caulk around windows, doors and anywhere a pipe, wire or vent goes through the wall. If the caulk has pulled away from either side of the gap, it’s no longer sealing anything, even if it still looks mostly intact.
Cut out all the old caulk, clean the gap and let it dry. If the gap is wider than about ¼ inch (6 mm), push a foam backer rod into it first. Backer rod is a squishy foam cord that fills the depth so the caulk only has to bridge the two sides. Check the label for the minimum temperature, since many caulks need 40 °F (4 °C) or warmer. Silicone holds up well outside but can’t be painted, so use a paintable caulk on trim you’ll repaint.
One place to leave alone: the small slots along the bottom of your window frames. Those are weep holes, and they let water drain out. Caulk them shut and you trap water inside the wall.
Measure first: Measure how wide the gap is, and note what’s on each side (vinyl, wood, brick or metal). Pick up exterior caulk and sealant that bonds to both.
8. Replace Worn Door Weatherstripping
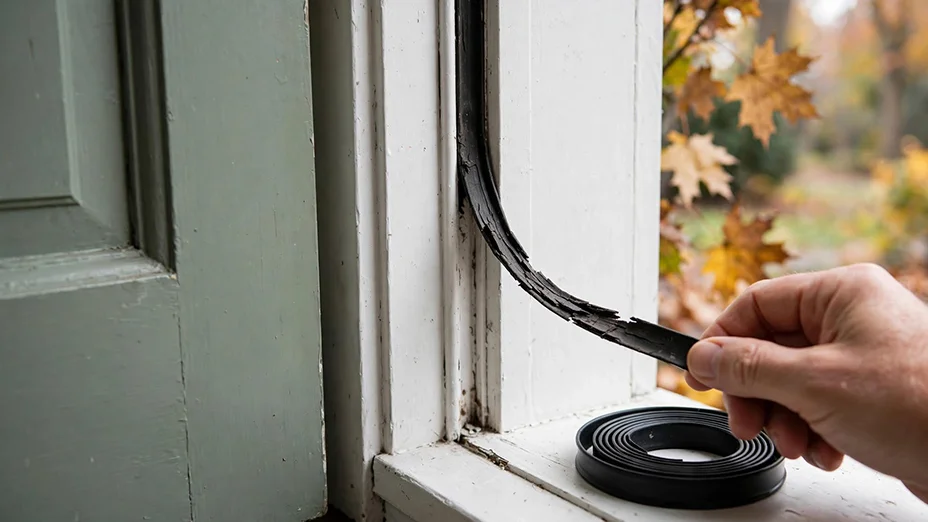
Here’s a simple test for your door seals. Close the door on a strip of paper, then pull it out. Try it every foot or so along both sides and across the top. Where the paper slides out easily, the seal isn’t touching the door.
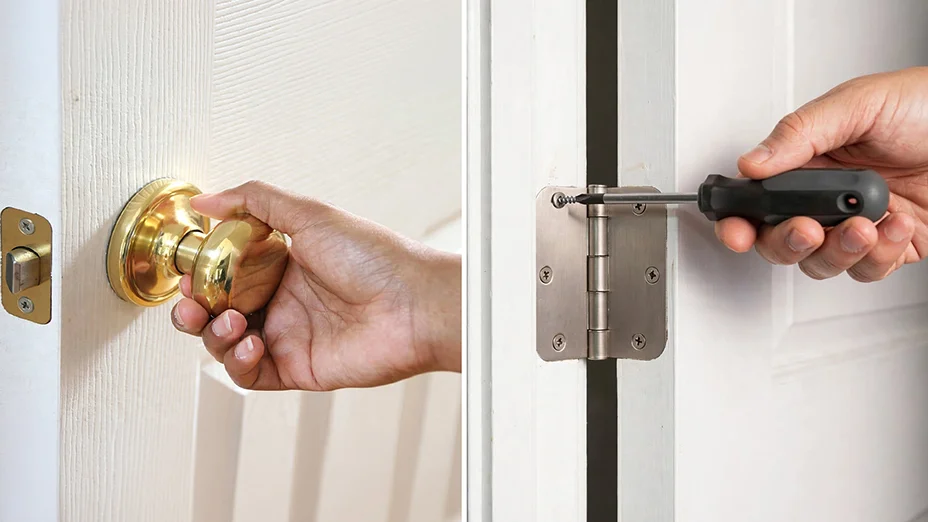
Before you buy new weatherstripping, check whether the door has sagged. If the gap is bigger at the top on the handle side, it has. Swapping one short screw in the top hinge for a 3-inch (76 mm) screw that reaches the wall framing will usually pull it back into line.
Weatherstripping attaches one of two ways. Some kinds press into a thin groove in the door frame, and others screw or stick onto the surface. Gently pull back a corner of your old strip to see which kind you have.
Measure first: Measure both sides and the top of the door frame, and note whether your seal presses into a groove or sits on the surface. Then shop door weatherstripping by that style.
9. Fix the Door Sweep and Garage Door Seal
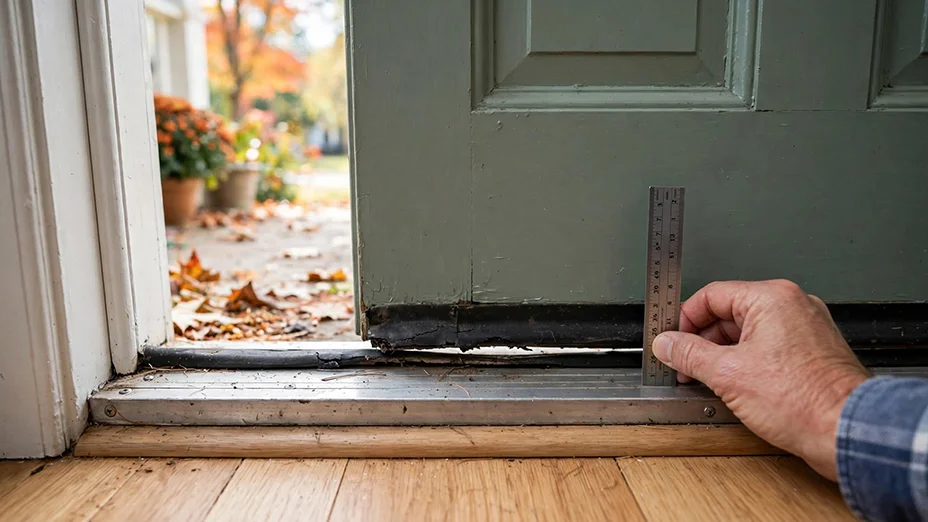
Close your door and look along the bottom from inside. If you can see daylight, cold air is getting in. The rubber sweep or threshold seal should touch the door evenly. It shouldn’t be so tight that the door drags or won’t latch.
Many metal thresholds have small screws under the rubber strip that raise or lower it, and a quarter turn is often all it takes. The rubber strip itself can usually be replaced without pulling up the whole threshold. If the door is fire-rated, like many doors between the garage and the house, check the label on the edge of the door before you change the bottom. Fire-rated doors have rules about what you can add.
Give the garage door the same check. A cracked or flattened seal along the bottom lets in cold air, leaves and mice. Garage seals slide into a track on the bottom of the door, so the replacement has to match that track.
Measure first: Measure the door width and the gap at the bottom. For a garage door, measure the width and take a photo of the track the seal slides into. You’ll find sweeps, thresholds and seals under door and window weatherization.
10. Add Insulating Film to Drafty Windows
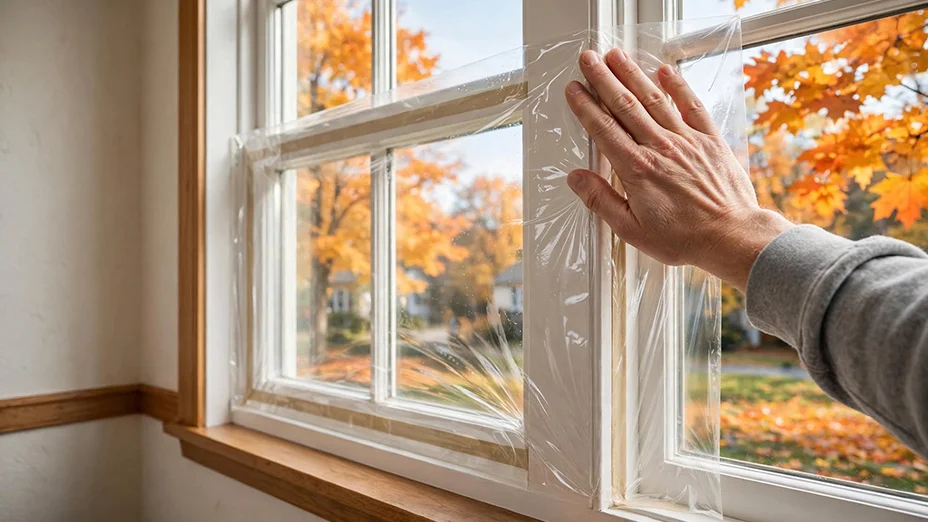
If an older window leaks air but is otherwise in good shape, a window insulation kit can make a real difference. You stick double-sided tape around the inside of the window trim, press clear plastic film onto it, then shrink it tight with a hair dryer. Film won’t fix a leaking window, a rotted sill or a foggy double-pane, so take care of those first.
Make sure you’re buying the right product. Insulation kits are different from the stick-on tint or privacy film that goes on the glass, which does nothing for drafts.
Think about bedroom windows before you cover them. Building codes in both the US and Canada require bedrooms to have a window that opens for escape in a fire. If you put film over that window, make sure everyone who sleeps in the room knows they can tear it away fast.
Measure first: Measure the window trim, not just the glass, and add about 1 inch (25 mm) on each side for the tape.
11. Test Your Locks and Tighten Your Hinges
How Do You Prepare Heating and Safety Equipment for Fall?
Head indoors for this part of your fall home maintenance checklist while the weather’s still mild. A furnace problem you find in October is an ordinary repair. The same problem in January is an emergency call, and you’ll be waiting in line with everyone else.12. Change the Furnace Filter
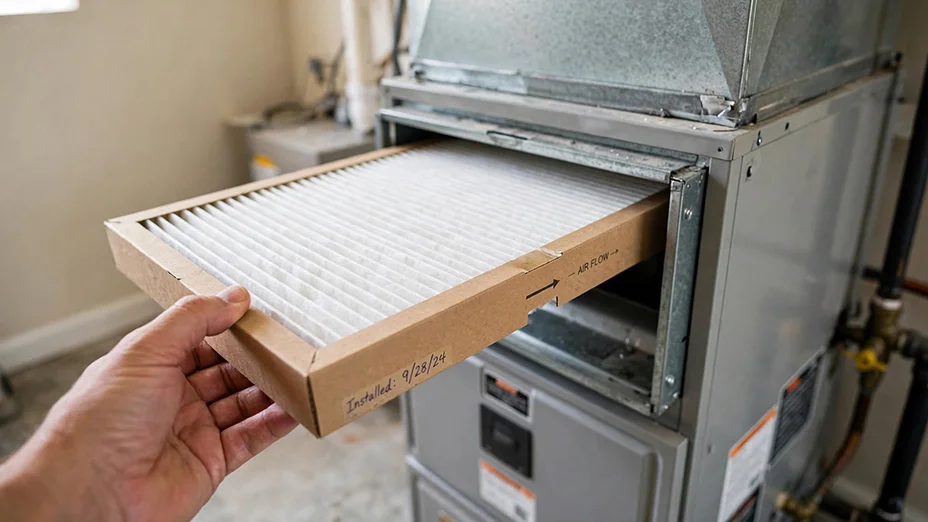
Here’s the catch with furnace filters: the size printed on the frame is rounded up. A filter labeled 16 × 20 × 1 usually measures about 15½ × 19½ × ¾ inches. That’s normal, and it’s why you should measure the slot or the old filter instead of trusting the label.
Slide the new filter in with the arrow pointing toward the furnace, in the direction the air flows. Write the date on the frame so you’re not guessing next time. Thin 1-inch filters usually need changing every 1 to 3 months, and thicker 4- or 5-inch filters every 6 to 12 months. If you have pets or have been doing dusty projects, change them more often. Our post on signs of a dirty air filter explains what a clogged one does to your system.
A word on MERV ratings, the number that shows how fine a filter is: higher isn’t always better. Most home furnaces do well with MERV 8 to 11. Go much higher than your system was built for and it can choke the airflow.
Measure first: Measure the length, width and thickness, and check your furnace manual for the highest MERV it allows. Then the shop furnace filters by the size you measured.
13. Give the Heat a Test Run
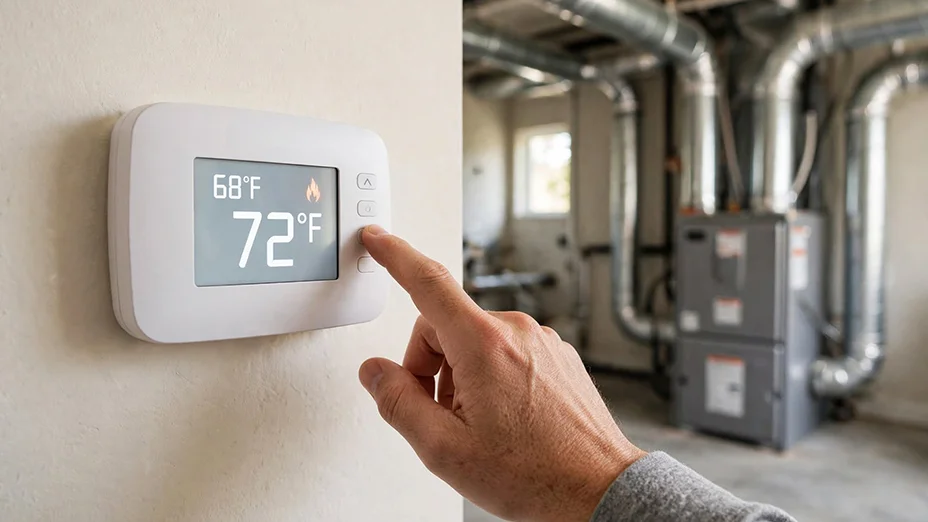
Turn the thermostat up a few degrees above room temperature and let the system run through a full cycle. It should start, blow warm air from the vents and shut off once the room warms up. Listen for squealing or banging, and watch for the system turning on and off again and again. If a light on the furnace is blinking or there’s an error code, snap a photo of it for your technician. Check out our full thermostat guide!
If you have a high-efficiency furnace, you’ll see two white plastic pipes running outside. Check that leaves, a bird’s nest or snow aren’t blocking them, because the furnace will shut itself off if they are.
Leave anything inside the furnace, like the burners or the flue, to a licensed technician. And if you ever smell gas, don’t flip any switches or use your phone inside. Get everyone out first, then call your gas company or 911 from outside.
Measure first: If you’re replacing the thermostat, take a photo of the wires behind the old one before you disconnect anything. Most Wi-Fi thermostats need a “C” wire for power. Baseboard heaters use a different, higher-voltage type of thermostat.
14. Clean Out the Dryer Vent
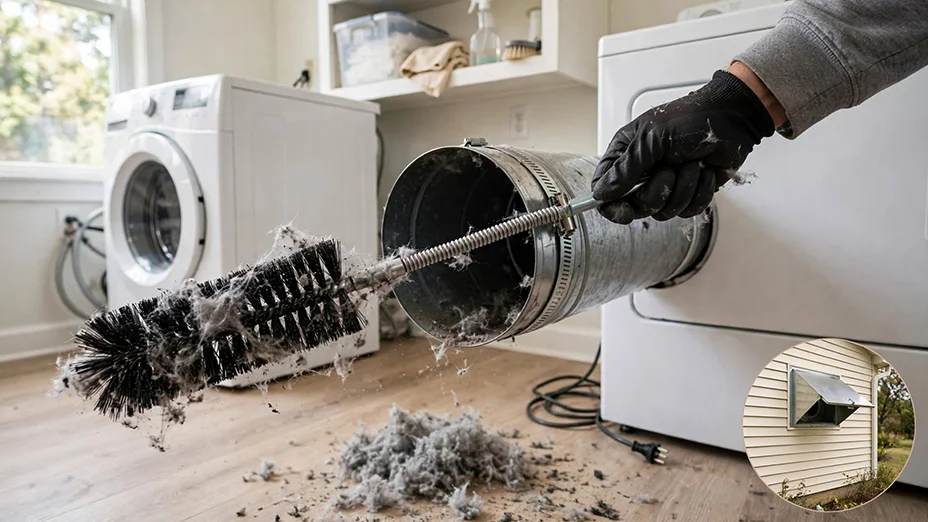
Lint buildup in dryer vents is one of the leading causes of home dryer fires, and the U.S. Fire Administration recommends cleaning the vent at least once a year. Fall is a good time to do it, because you’ll be running the dryer more once it’s cold out.
Unplug the dryer first, and if it’s a gas dryer, turn off the gas valve behind it. Pull the dryer out, disconnect the hose and clean out lint from the hose, the opening in the wall and the vent cap outside. Make sure the flap on the outside vent opens and closes freely.
While it’s apart, take a look at what you’ve got:
- The hose behind the dryer: if it’s white plastic or thin foil that crushes easily, replace it with a semi-rigid or rigid metal duct. The flimsy kind sags, traps lint and can catch fire.
- The run to the outside: shorter and straighter is better. Every bend adds drag and gives lint a place to collect.
- The outside cap: it should have a flap but no screen, because screens catch lint and clog.
If the vent runs through a finished ceiling, or it’s longer than your cleaning brush can reach, have a pro clean it.
Measure first: Most dryer vents are 4 inches (102 mm) across. Measure how far the vent runs so you get a cleaning brush long enough to reach, then shop dryer vent parts to match.
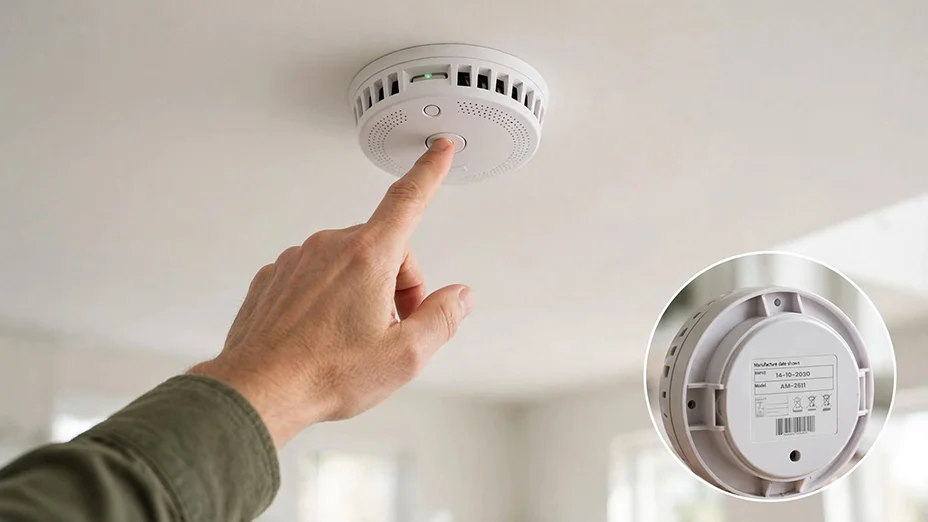
15. Test Your Smoke and CO Alarms
What Outdoor Hazards Should You Clear Before Winter?
Wrap up outside with the jobs that become dangerous once ice shows up: clogged drains, cracked driveways and a chimney nobody has checked since spring.16. Clear Leaves Off Drains and Walkways
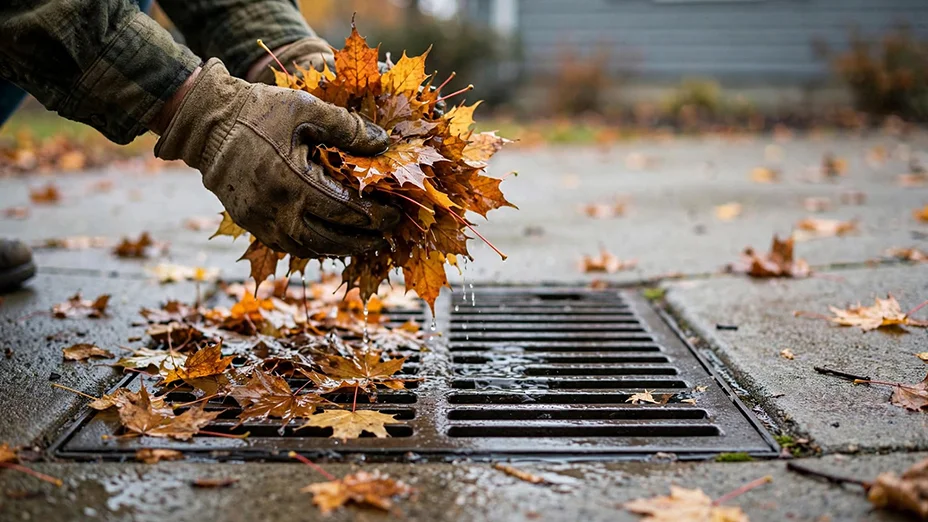
Rake or sweep leaves off storm drains, window wells, steps and the path to your outdoor shutoffs and gas meter. Wet leaves are slippery now, and when they freeze it gets worse. A mat of leaves over a drain also sends rainwater across your walkway, where it turns to ice overnight.
Check again after windy days and once the last leaves come down.
Measure first: Nothing to measure here. Just check your town’s yard-waste pickup dates and bagging rules before you rake everything to the curb.
17. Fill Cracks in the Driveway
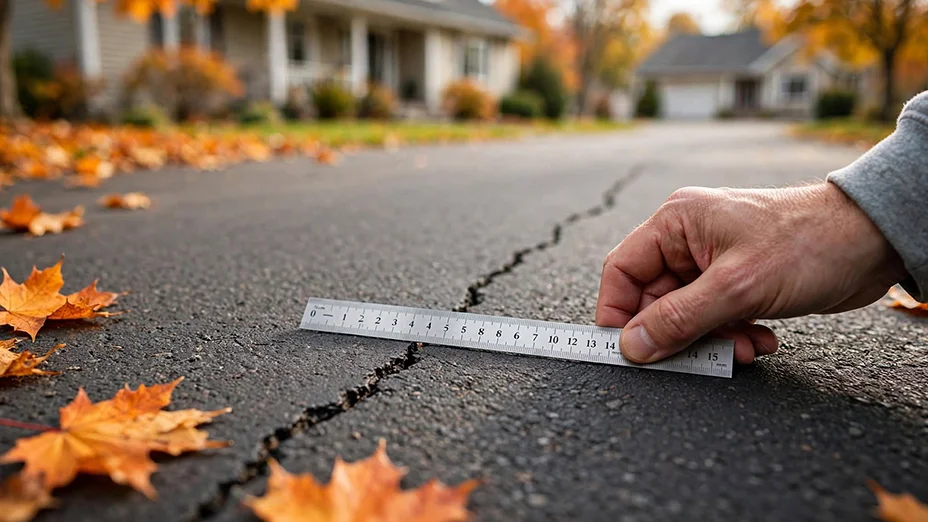
Water that gets into a driveway crack expands when it freezes and pushes the crack wider. That’s how a thin crack in October turns into a pothole by March. Clean each crack out with a stiff brush, pull any weeds and let it dry.
Crack Size | What to Use |
Hairline, under ⅛ in (3 mm) | Driveway sealer, or a squeeze-bottle crack filler |
⅛ to ½ in (3–13 mm) | Pourable or caulk-tube asphalt crack filler |
½ to 1 in (13–25 mm) | Foam backer rod first, then filler on top |
Wider than 1 in, or sinking | Cold-patch asphalt, or call a paving pro |
Most crack fillers need a dry day around 50 °F (10 °C) or warmer, so in colder areas, do this early in the fall. And if your driveway is concrete, use a concrete filler, because asphalt products won’t stick to it.
Measure first: Measure how wide and how long the cracks are. Wide cracks take far more filler than most people expect.
18. Get the Fireplace or Wood Stove Checked
Have your chimney, fireplace or stove vent inspected once a year, before you light the first fire. Chimney sweeps the book up fast once it gets cold, so call early.
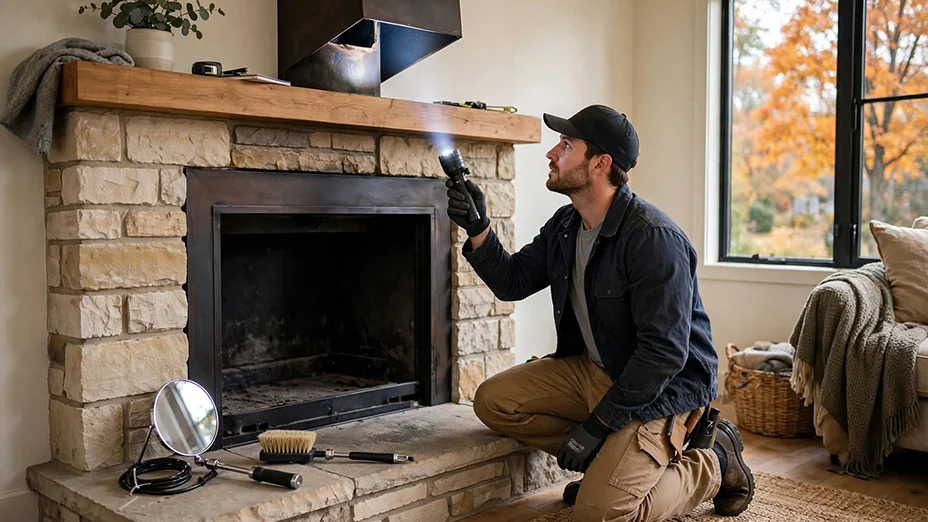
What gets checked depends on what you have:
- Wood-burning fireplace or stove: the big concern is creosote, a sticky, flammable buildup inside the chimney. A sweep will tell you whether it needs cleaning. Also check that the damper opens all the way and that the chimney cap is still in place.
- Gas fireplace: have it serviced once a year. Soot on the glass or fake logs, or a lazy yellow flame, means it needs attention now.
- Pellet stove: clean the vent pipe and ash areas as often as the manual says. Many models need it after every 1 to 2 tons of pellets.
Don’t use any of them if the vent is blocked, cracked or loose.
Quick Tip
Know what type of fireplace or stove you have and the size of its vent pipe before you buy brushes or chimney parts. A brush sized for one won't clean another.
Printable Fall Home Maintenance Checklist
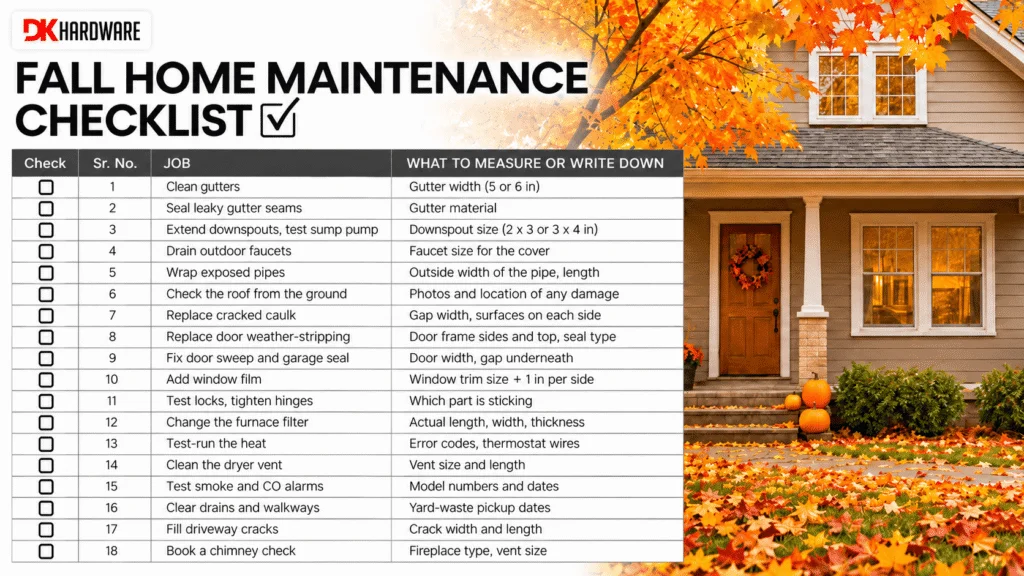
Take this list around the house with your phone. Writing measurements down while you’re standing next to the thing is what saves you a second trip to the store.
Frequently Asked Questions
Start with anything that can freeze and break: clean the gutters, point downspouts away from the house, drain outdoor faucets and wrap exposed pipes. After that, test the heat, change the furnace filter and check your smoke and CO alarms. Drafts, driveway cracks and the chimney can come next.
A good home maintenance checklist for fall covers five areas: drainage (gutters, downspouts, sump pump), plumbing (outdoor faucets and exposed pipes), the outside of the house (roof, caulk, door seals, windows), heating and safety (furnace, dryer vent, alarms), and the yard (drains, driveway, chimney).
Drain your outdoor faucets and take off the hoses before the first night that’s forecast to go below freezing, 32 °F (0 °C). Don’t wait for a hard freeze. One cold night with a hose still attached can split the pipe.
Routine maintenance on a home means the jobs that come back on a schedule. That includes changing the furnace filter every few months, testing smoke alarms monthly, cleaning gutters in spring and fall, cleaning the dryer vent and checking the chimney once a year, and checking caulk and door seals every fall.
What to Do Next?
- Look up your area’s first-freeze date and plan to do the faucet and pipe jobs (4 and 5) a couple of weeks before it.
- Walk the house once with a tape measure and fill in the fall home maintenance checklist table above before you buy anything.
- Book the pros now: a furnace tune-up if your test run turned up a problem, the chimney sweep, and a roofer for anything you photographed. Their calendars fill up fast in the fall.
- Buy parts by your measurements, not by the label: pipe insulation by the pipe’s outside width, filters by actual size, and weatherstripping by how it attaches.
- Keep a simple house record of filter sizes, alarm dates and vent sizes in your phone. Next year’s fall home maintenance checklist will take half the time.
- Call a pro if you smell gas, if your furnace keeps shutting off, if the roof is too steep to walk, or if the driveway is sinking rather than just cracking.