




When a break wanders off the line, almost everyone blames their hands. Usually it was the wheel, or the wrong wheel for the glass.
The numbers make the point. A wheel ground at 120° to 140° needs roughly five or six pounds of pressure to score thin glass cleanly. A wheel ground at 154° needs twenty pounds or more to score a half-inch plate. Put the thin-glass wheel on a thick plate and no amount of leaning on it produces a score that runs. Put the thick-plate wheel on a window pane and you’ll crush the surface into a white, chippy line that breaks anywhere it likes.
That mismatch, not shaky hands, not inexperience, is what ruins most first attempts. A glass cutter doesn’t cut glass; it scores it, pressing a shallow fissure into the surface for the break to follow. Every tool on this page exists to control one of two things: the consistency of that fissure, or the accuracy of the break that follows.
Three variables decide which tool you need: what glass you’re cutting, how thick it is, and how often you’ll be doing it.
One variable overrides all three: if the glass is tempered, none of this applies. Scoring tempered glass shatters the whole pane, and no tool or technique changes that. Check the corner for a tempering stamp before you buy anything.
Your project | The tool to buy | Why |
Replace a broken window pane | Carbide wheel cutter + cutting oil + straight edge | One clean straight score is the whole job |
Cut a mirror to fit a frame | Above, plus running pliers and an L-square | The break has to run true or the coating tears |
Stained glass / pattern work | Self-oiling carbide cutter, narrow pattern head | Tight curves need a head that follows the line |
Circles and cutouts | Pivot circle cutter with a vacuum base | A fixed radius holds depth constant around the arc |
Daily glazing work | Oil-fed T-cutter or turret cutter, replaceable wheels | Wheel changes and oil refills become the bottleneck |
Tempered or laminated glass | None of the above — see below | Scoring tempered glass destroys the pane |
Which is the Best Glass Cutting Tool for Your Project?
For most people, the best glass cutting tool is a self-oiling carbide wheel cutter. It removes the two variables that ruin cuts, a dull wheel and a dry score, and it doesn’t ask for technique you don’t already have.
Here’s how the four options compare.
Cutter type | Edge life | Best for | The catch |
Steel wheel | One session, at best | A single pane replacement | Your last cut is worse than your first |
Holds through a full session | Repeat cuts, general glazing | Oil has to be applied manually on every score | |
Self-oiling carbide | Same as carbide, more consistent | Stained glass, mirror, anything past a few cuts | Costs more up front; reservoir needs refilling |
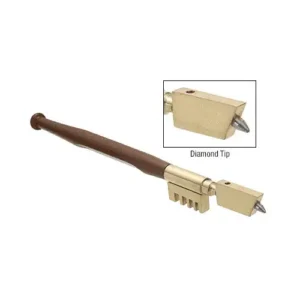
Diamond tip | Longest | Production and specialty work | Not an upgrade over carbide for ordinary glass |
The packaging tells you what the trade thinks
Steel replacement wheels for the CRL Fletcher heavy-duty cutter ship ten to a package. Carbide replacements ship one at a time.
Steel wheels are consumables. Carbide wheels are components. That’s the whole comparison in one line — and it’s why a steel-wheel cutter is fine for one repair and a bad idea for a project. Cut six pieces and you’ll be scoring the last two with a wheel that no longer bites, then blaming your technique.
Two specs worth checking before you buy
- Phosphor bronze axle — the best-performing bearing material for a cutter wheel, which is why it appears on professional-grade tools. If a listing states it, that’s a reliable quality signal.
- Spring-loaded self-oiling head — depress the head, a wick feeds oil to the wheel. Lubrication on every score with no separate step, which is precisely where inconsistency creeps in.
Diamond tips are not a mirror tool
Worth clearing up, because the myth is everywhere: a mirror is ordinary annealed glass with a coating on one face. A carbide wheel cuts it normally. Diamond-tipped cutters earn their place in production and specialty work, but they are not required for mirror.
Recommended Categories For You
Wheel Material, Hone Angle, and Why Do They Matter?
Hone angle is the spec most buyers ignore and the one that decides whether your score runs cleanly.
The wheel doesn’t cut glass. It presses a shallow fissure into the surface, and the angle to which the wheel’s edge is ground controls how deep that fissure goes.
The rule: a lower hone angle number is for thinner glass. A higher number is for thicker glass. The number is the included angle of the wheel’s V — so 154° is nearly flat, and 180° would be a plain roller.
Fletcher’s own cutting wheel range runs from 114° to 154°. Here is how the angles map to glass:
Hone angle | Suited to |
114°–124° | Thin glass; standard window glass, auto glass |
134°–140° | Stained glass and art glass; 1/8″ double strength through 3/16″ (3–4 mm) |
144° | 3/16″ to 1/4″ (4–6 mm) |
154° | 3/8″ to 1/2″ (8–12 mm) and heavier plate |
Pressure scales with the angle. Five or six pounds is enough on thin glass with a 120°–140° wheel. Twenty pounds or more is needed with a 154° wheel on very thick glass. If you find yourself pressing hard on a window pane, you have the wrong wheel — not weak hands.
Three practical notes:
- Wheel diameter is your escape route. Replacement carbide wheels commonly come at a universal diameter — DK’s CRL replacement wheels are 5/32″ (4 mm) — fitting a wide range of modern handles and housings. Buy into that standard and you’re not locked to one manufacturer’s replacement supply.
- A turret carries six wheels. Rotate to a fresh edge mid-job instead of stopping to swap.
- The wheel must roll freely. Check before you start. A wheel that skids instead of rolling wears flat on one side and becomes a skipper — it’ll break the score line into gaps and you’ll blame the glass.
Know your glass thickness before you pick a wheel. Suppliers use specific vocabulary: single strength is roughly 3/32″ (2.4 mm), double strength roughly 1/8″ (3 mm). Above that you’re into 3/16″, 1/4″ and heavier plate.
Circular Glass Cutting Tools for Circles and Curves
Circular glass cutting tools exist because a circle is a constant-depth problem, not a straight-line problem.
Hold a handheld cutter freehand around an arc and the wheel angle changes continuously against the glass — so the depth changes with it. A fissure of inconsistent depth breaks unpredictably.
A pivot circle cutter fixes this mechanically:
- Vacuum cup base anchors the centre point
- Graduated radius bar sets the distance to the cutting head
- Swivelling head stays tangent to the arc all the way around, so depth stays constant
- Adjustable arm resets the radius on a scale rather than swapping tools between sizes
Two things to check before you buy one
Check | Why it matters |
Will the base hold? | A vacuum cup needs a flat, clean, dry surface. Dust or moisture under the cup and the centre wanders mid-arc — ruining the circle and the sheet. |
Is the head self-oiling? | You can’t stop halfway round a circle to re-oil. A dry pivot cutter scores unevenly on the back half of the arc. |
Pivot cutter or rotary tool?
For interior cutouts, tight radii and irregular shapes where a pivot arm won’t physically fit, a rotary tool with a diamond wheel is the alternative. It grinds through the glass rather than scoring it — so it can start a cut in the middle of a sheet — but the edge comes out rough and needs seaming afterwards. It’s a different operation, not a substitute.
Cutting task | Tool | Key constraint |
One circle, fixed radius | Pivot circle cutter, vacuum base | Surface must be flat, clean and dry |
Repeated identical circles | Adjustable-arm circle cutter | Radius resets on a graduated scale |
Interior cutout or tight radius | Rotary tool with diamond wheel | Edge requires finishing after the cut |
Professional Glass Cutting Tools: What Changes at Volume?
Professional glass cutting tools aren’t better versions of hobby tools. They’re built around a different constraint: throughput.
Cut two pieces a year and the cost that matters is a ruined pane. Cut two hundred and the costs that matter are wheel changes, oil refills, and hand fatigue.
|
Tool |
What it solves |
|
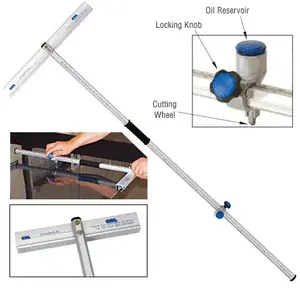
Oil-fed T-cutter |
Rides the sheet edge on rollers, feeds oil automatically — fast, consistent strip cutting |
|
Turret cutter |
Multiple wheels on a rotating head; a dulled edge is a quarter-turn away, not a disassembly job |
|
Pistol-grip cutter |
Grip geometry drives substantially more pressure through the wheel — what heavy plate and hard glass demand |
|
Replaceable wheel unit |
The difference between a tool with a service life and a tool with a shelf life |
One thing the professionals do that hobbyists rarely copy: they stand up to cut. A cutting table set between hip and waist height lets you drive consistent pressure down the full length of a score using body weight rather than forearm. Seated, your pressure varies across the stroke — and varying pressure is varying fissure depth.
If you’re specifying for a shop rather than a garage, the question isn’t which cutter scores best — most professional-grade carbide cutters score comparably. The question is which one your team can run for eight hours without their forearm giving out, and how fast they’re back to work when the wheel goes.
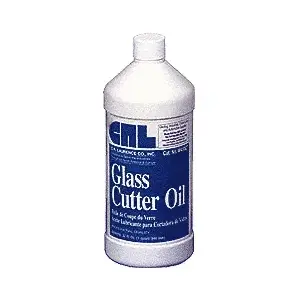
Cutting Oil – This Isn’t Optional
Cutting oil cools the wheel and lowers the friction that rounds the edge. A dry score chatters, flakes, and dulls your wheel faster than anything else you can do to it.
Purpose-formulated glass cutting oil holds viscosity through a full stroke and cleans off without leaving residue that would interfere with adhesives or sealants later in the build. That last point isn’t incidental — if you’re cutting glass for a bonded or glazed assembly, residue on the edge is a failure you discover after installation.
Why the usual substitutes fail:
|
Substitute |
Failure mode |
|
Cooking oil, machine oil |
Too viscous — coats the surface, leaves residue that interferes with adhesives |
|
Penetrating spray lubricant |
Not formulated for scoring contact; won’t hold a film across a full-length cut |
|
Water |
Evaporates before the stroke finishes |
|
Kerosene or white spirit alone |
Strips the oil off the cutter’s own axle — you’ll seize the wheel you’re trying to protect |
Self-oiling cutters remove the decision entirely. The reservoir feeds the wheel through a wick every time the head depresses, so every score gets the same lubricant with no separate step between cuts.
Clean the oil off before any adhesive work, sealant application, or kiln firing.
|
Cutting task |
Tool |
Key constraint |
|
One circle, fixed radius |
Pivot circle cutter, vacuum base |
Surface must be flat, clean and dry |
|
Repeated identical circles |
Adjustable-arm circle cutter |
Radius resets on a graduated scale |
|
Interior cutout or tight radius |
Rotary tool with diamond wheel |
Edge requires finishing after the cut |
Recommended Categories For You
How to Score and Break Glass?
The whole operation is one pass and one break. Most failures happen because someone treated it as more than that.
- Set the glass on a flat, clean, well-lit surface. Grit under the sheet becomes a stress point — and the glass breaks where the grit is, not where you scored.
- Mark your line. A glass-specific felt marker or white china marker adheres and wipes off with solvent; ordinary pencil and ink smear under the cutter body. For patterns with frequent direction changes, mark the path and scribe small reference points at the turns.
- Set your guide and account for the offset. A straight edge doesn’t sit on the cut line. It sits back from it by the distance between the cutter body and the wheel centre — typically 3/16″ to 1/4″ depending on the cutter. Measure your tool’s offset once and write it on the guide. An L-square squares the corner and guides the perpendicular cut without moving the sheet.
- Hold the cutter perpendicular to the glass. Lean it left or right and you grind an angled fissure, which produces an angled break. This is the error most people never diagnose because the score looks fine from above.
- Score in one continuous pass, edge to edge, with even pressure. Speed and pressure trade against each other — a faster wheel cuts deeper, so if you’re moving quickly, press more lightly; if you’re working slowly around a curve, press harder. Consistency matters more than the absolute figure. The most common beginner error is easing off approaching the far edge, which fails the fissure at the terminal point and sends the break wandering.
- Judge the score by looking, not listening. A good score is almost invisible from directly above — you’ll only catch it at an angle. A white, crunchy line means you pressed too hard. That edge will chip and it will be weak.
- Never run the same line twice. A second pass doesn’t deepen the fissure. It crushes the glass, produces a chipped break, and destroys your wheel. (You can cross a score. You just can’t retrace one.)
- Break it now. The trade calls a score left too long a cold cut, and a cold cut doesn’t run true — the break wanders off the line. Score and break as one operation.
Running the break
Fingers work on wide pieces. They don’t work on narrow strips, and they don’t work when the fracture has to follow the line exactly.
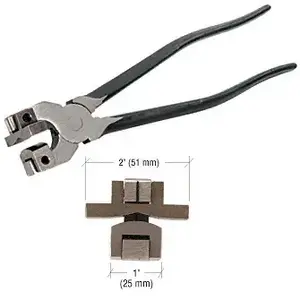
Tool | How it works | Capacity |
Centre on the score with an alignment mark; the curved jaw spreads pressure evenly either side, starting the fracture along the line rather than across it. A floating-block jaw stays perpendicular through the squeeze, preventing the flare conventional pliers cause. | Varies by model — check the spec | |
Drop jaw pliers | Flat upper jaw supports the top face; humped lower jaw levers from beneath | Up to 1/2″ (12 mm) — CRL 8-1/2″ drop jaw |
Heavy breaking pliers | Compound-action handles for controlled pressure on narrow strips and corner notches | Up to 5/8″ (15.7 mm) — CRL TP7040 |
If you’re tapping instead: two or three light taps with the ball end of the cutter handle, on the underside, will propagate the fracture — you’ll watch it travel along the line. Stop there. Extra tapping destabilises the surrounding glass and increases the chance of an off-line break.
Recommended Categories For You
Scoring in cold conditions
Cold glass is harder and more brittle than warm glass, and less elastic — and that elasticity is part of what lets a break run cleanly along the fissure instead of jumping off it. Cutting oil thickens as the temperature drops, changing how it films across the stroke.
The critical factor isn’t the absolute temperature so much as uniformity. Glass that is cold throughout can be scored and broken; glass with a temperature gradient across it — a sheet brought in from a cold truck and starting to warm on one face — is where the unwanted breaks come from.
Practical rule for a winter shop: either let the sheet reach a stable room temperature before scoring, or work it cold and score more gently. What you cannot do is score it halfway through the transition.
Cutting Mirror Without Wrecking the Backing
A mirror is annealed float glass with a reflective coating and protective paint on one face. It cuts with the same carbide wheel and the same stroke as any other flat glass. Orientation is the only thing that changes.
The silver and paint layers are soft and won’t carry a clean fissure. The wheel rides unevenly across them, the break wanders, and the coating peels away from the edge as it separates.
Flip the mirror, score the plain glass side, and the coating follows the break without damage. That single step prevents the most common first-time mirror-cutting failure.
The Glass You Cannot Cut — and the Glass You Are Not Allowed to Cut
Two separate limits. Both matter, and most guides only mention the first.
Glass that physically cannot be scored
Tempered glass cannot be cut. Heat treatment puts the outer surfaces into compression with the core in tension. Score through the compression layer and you release that stored energy instantly, the entire pane fragments. No technique works around this. If it’s tempered, it has to be ordered cut to size before tempering.
Laminated glass resists standard scoring. A plastic interlayer bonds two glass layers together and holds the pieces in place even after both faces are scored. Cutting it means scoring both sides, breaking both, then separating the interlayer — a different process with different tools.
Check for a tempering stamp in the corner of the pane before you touch it with a cutter.
Glass you are legally required not to substitute
Building codes designate certain hazardous locations where safety glazing — tempered or laminated — is mandatory. In those locations you cannot cut annealed glass to fit, no matter how clean the score.
And here’s what almost nobody tells you: the US and Canada do not draw the line in the same place. The American rules cast a considerably wider net.
United States — IRC Section R308.4 designates seven categories of hazardous location:
Location | Trigger |
Glazing in doors | Swinging, sliding and bifold doors |
Glazing adjacent to doors | Within 24″ of either side of the door, where the bottom exposed edge is under 60″ above the floor |
Glazing in windows | Pane larger than 9 sq ft and bottom edge under 18″ and top edge over 36″ and a walking surface within 36″ — all four must apply |
Guards and railings | Regardless of area or height |
Wet surfaces | Tubs, showers, saunas, spas, pools — bottom edge under 60″ above the standing surface |
Adjacent to stairs and ramps | Bottom edge under 36″ above the adjacent walking surface |
Adjacent to the bottom stair landing | Under 36″ above the landing, within 60″ of the bottom tread |
Safety glazing in the US is certified to CPSC 16 CFR 1201, and each pane carries a permanent, non-removable designation — acid-etched, sandblasted, ceramic-fired or laser-etched.
Canada — NBC / provincial codes, Section 9.6.1.4 is narrower and focused on doors:
- Glass sidelights over 500 mm wide that could be mistaken for doors
- Glass in storm doors and in sliding doors at every entrance to a dwelling unit and in public areas
- Glass in entrance doors where the pane exceeds 0.5 m² and extends to less than 900 mm from the bottom of the door
- Shower and bathtub enclosures — plain glass is not permitted, full stop
- Glazing in guards (Section 9.8.8.7)
Safety glazing in Canada is certified to CAN/CGSB-12.1, Safety Glazing. Two currency notes that trip people up: the 2017 edition withdrew wired glass as an acceptable safety glazing material, and the standard has been revised again since. Check which edition your provincial code references.
Provincial variation is real. Ontario’s rule keys on sidelights over 500 mm wide. British Columbia’s wording covers sidelights and windows located within 915 mm of doors — a different trigger producing a different answer for the same window. Check your province, not the national code alone.
The practical consequence: a large low window that legally requires tempered glass in Ohio may not require it in Ontario. A DIY glazing guide written for a US audience does not transfer across the border, and neither does one written for a Canadian audience. If you’re near a door, a stairway, a tub, or a guard, check your local code before you cut anything.
None of this is a reason not to cut your own glass. Picture frames, cabinet inserts, tabletop protectors, stained glass panels, mirror to fit — all entirely reasonable. Door lights, shower enclosures, low windows near walkways are not, and that has nothing to do with your skill with a cutter.
Working Safely with Glass
- Wear eye protection every session. Glass fragments during breaking, and fragments travel.
- Wear cut-resistant gloves, not general work gloves. There’s a real tradeoff: heavy gloves kill the tactile feedback you need to hold consistent pressure through a score. Cut-resistant gloves stay thin enough to preserve feel while protecting against edges.
- Sweep or vacuum immediately. Chips and slivers get tracked, then end up under the next sheet where they become a stress point.
- Wrap and label offcuts — taped between cardboard, marked as glass — rather than loose in a bag. This is for whoever handles the bin after you.
- Test on scrap from the same sheet. Different manufacturers, different thicknesses, and even different colours of glass score differently. A test cut on an offcut of anything new to you will save you the full sheet.
- Wet-grind or use extraction when grinding edges. Dry grinding glass generates dust you don’t want in your lungs.
Recommended Categories For You
Glass Cutting Tools: What to Check Before You Buy?
Comparing glass cutting tools for sale comes down to five specs. Most listings bury at least three of them.
Check | Why it matters |
Wheel material | Steel dulls within a session; carbide holds an edge. If it isn’t stated, assume steel. |
Hone angle | The single spec determining whether the tool suits your glass thickness. A listing that omits it is a listing you can’t evaluate. |
Replaceable wheel or head | Determines whether you’re buying a tool or a consumable. Confirm replacement wheels are actually stocked before committing to a system. |
Axle material | Phosphor bronze is the professional standard bearing for cutter wheels. Its presence is a reliable quality signal. |
Self-oiling vs. manual | Removes the most common source of inconsistency. Worth the difference for anything beyond a single repair. |
Wheel diameter compatibility is your exit route. Replacement carbide wheels commonly come at a universal diameter fitting many modern handles and housings. Buy into that standard and you’re not locked to one manufacturer’s replacement supply for the life of the tool.
Recommended Categories For You
Frequently Asked Questions
A carbide scriber or diamond-tipped file can score glass for a controlled break, provided the stroke is continuous and reaches both edges. For curved shapes or tile work, a rotary tool fitted with a diamond grinding disc is more reliable, because a scratched straight line won’t run a curve. Neither approach matches the consistency of a proper wheel cutter, and both are harder on your hands.
Re-scoring the same line, skipping lubrication, uneven pressure through the stroke, easing off before the far edge, tilting the cutter off perpendicular, tapping too many times, and leaving the score too long before breaking it. Scoring too close to the existing edge of the sheet is another frequent one — the glass has no material to distribute the stress into, so the break goes where it wants. Each disrupts the fissure at a different stage, so identifying where it went wrong tells you which mistake you made.
Tempered glass. Heat treatment puts the surface under compression, and disturbing that layer releases the stored stress instantly — the whole pane shatters rather than separating along the line. Laminated safety glass also resists standard scoring, because the plastic interlayer holds the pieces together even after both faces are scored. Beyond the physical limits, building codes in both the US and Canada require safety glazing in specific locations, so there are places where cut-to-size annealed glass is not a permitted substitute regardless of technique.
For a single repair, the difference is small. Across recurring work, carbide holds its edge far longer before score quality drops off. You can see how the trade treats the distinction in how replacements are packaged: steel wheels commonly sell ten to a pack, carbide one at a time. Steel is a consumable. Carbide is a component.
For straight cuts in standard annealed glass — picture frames, cabinet inserts, tabletop protectors, stained glass panels, mirror to fit — yes, comfortably, once you own the tools. The economics change with thickness, with tight radius tolerances, and with anything requiring tempered or laminated glass, where cutting isn’t an option at all and the glass has to be ordered to size.
Get The Right Glass Cutting Tools the First Time
Identify the glass and its thickness, pick the hone angle that matches it, then pick the cutter that carries that wheel. Get oil on every score. Break it the moment you’ve scored it. Those four decisions account for nearly every clean cut and nearly every ruined sheet, and none of them require a steady hand – only a matched tool.
For a straight cut in ordinary annealed glass, a self-oiling carbide cutter, a bottle of cutting oil, an aluminium straight edge and a pair of running pliers will get you there. Add a pivot circle cutter when the job needs arcs. Add a turret cutter and a supply of replacement wheels when you’re cutting often enough that stopping to change a wheel becomes the thing that irritates you.
And before any of it: turn the pane over and look for the tempering stamp. That single glance is the difference between a project and a pile of fragments.