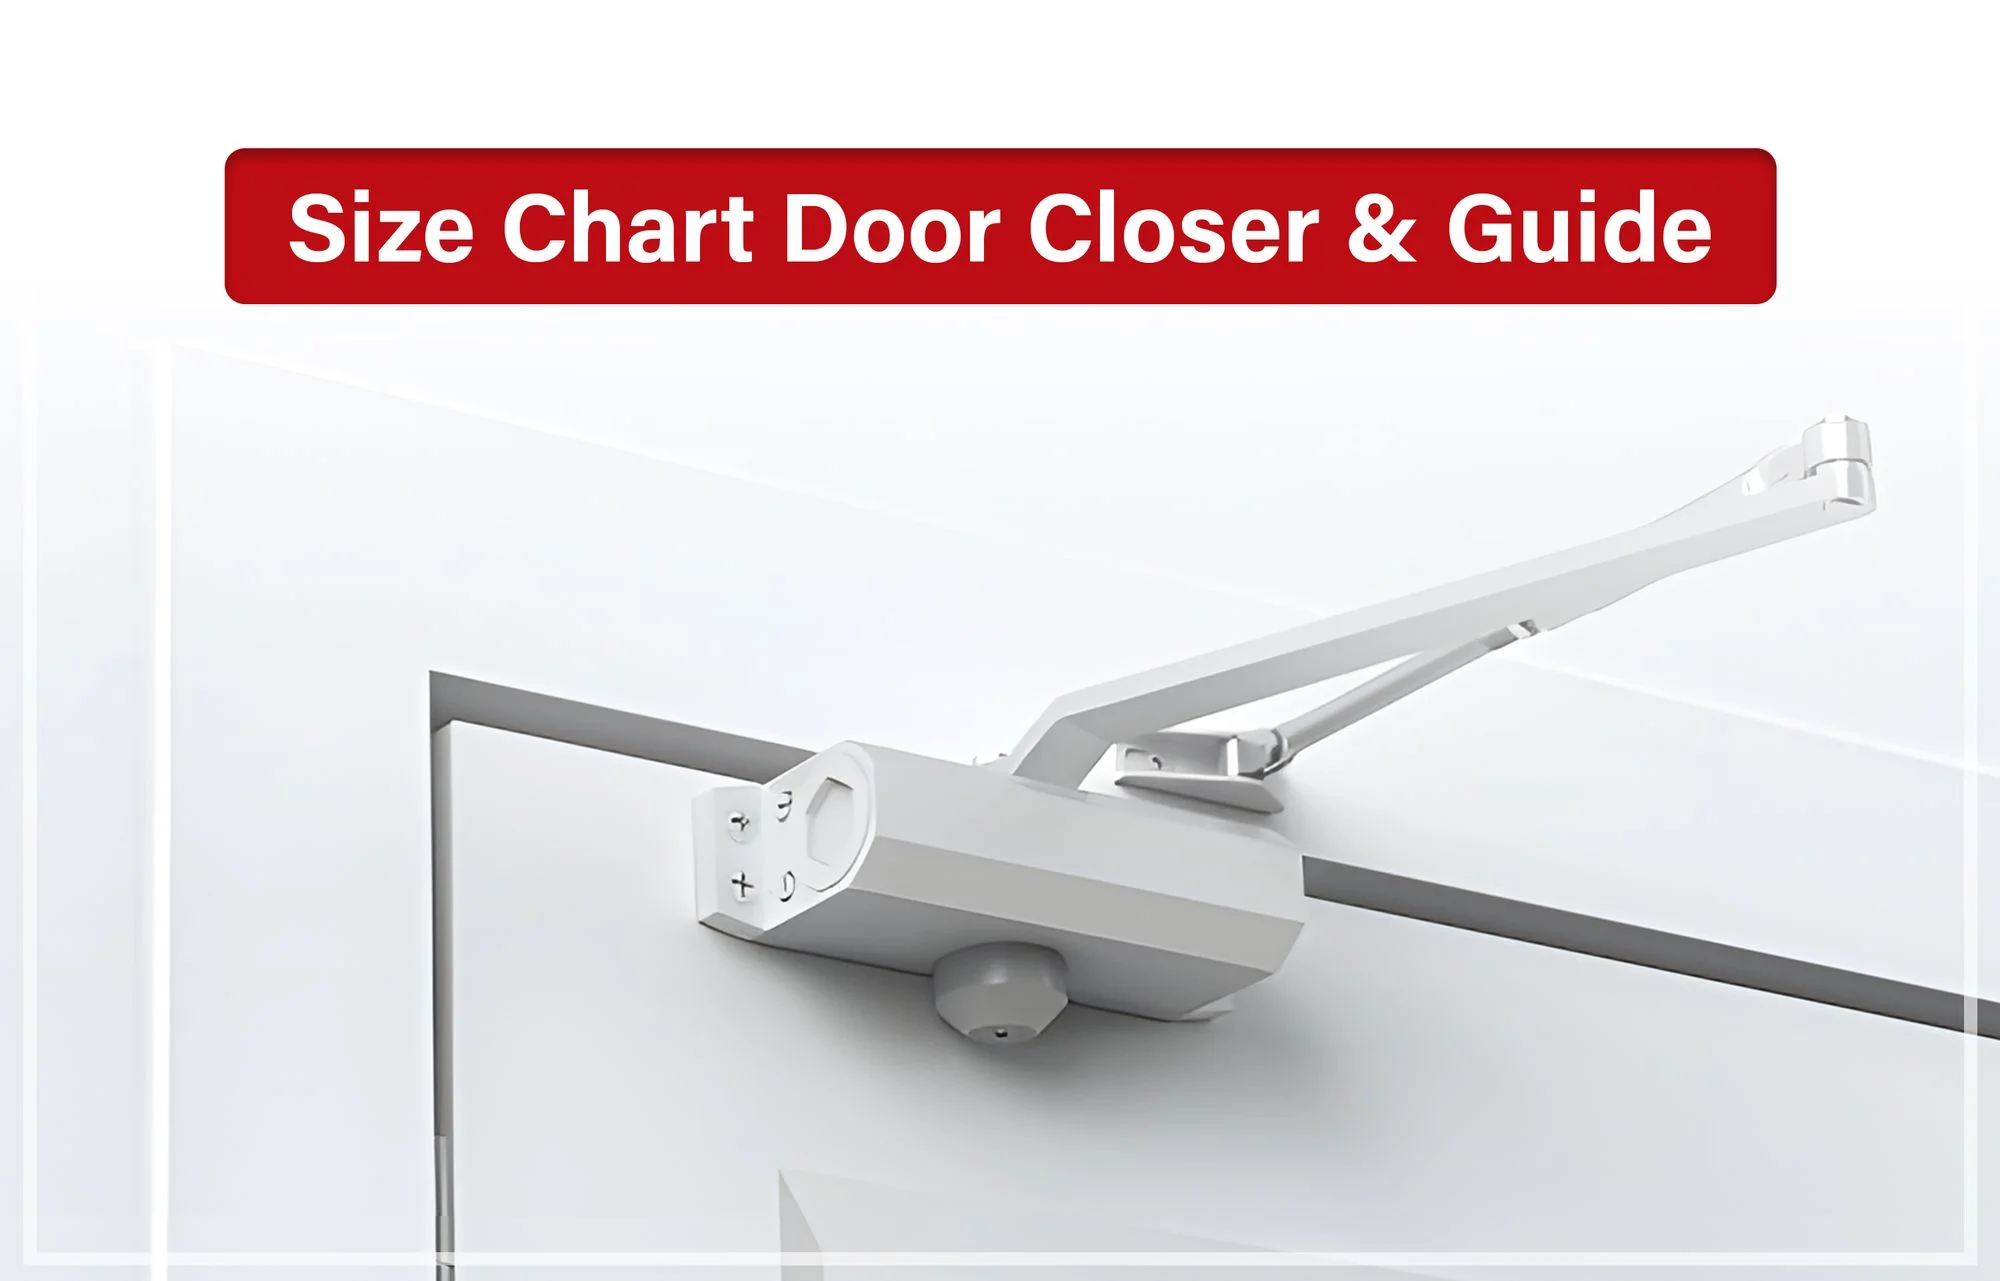

Is your door slamming shut, closing too slowly, or refusing to latch? Start by watching it close from a fully open position. Check its speed through the main swing and again as it approaches the frame. These observations will help you decide what to inspect before making adjustments.
If the door moves too quickly through most of its swing, check the main closing speed. If it moves normally and bangs into the frame at the end, check the latch speed. If it catches or rubs, the closer may not be the problem.
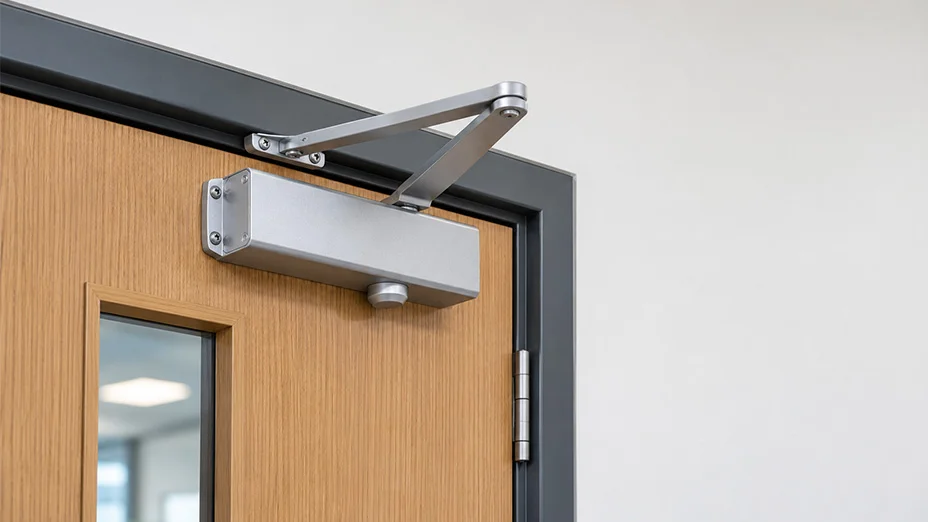
This guide covers surface-mounted hydraulic door closers commonly used on commercial doors and some residential entry doors. Storm-door tube closers, concealed closers, and powered door operators need their own model instructions.
Which Door Closer Setting Should You Check?
First, look for loose hardware, damage, or fresh oil around the closer. If anything looks wrong, address it before testing or adjusting. Otherwise, open the door to about 90 degrees, keeping within its normal opening range, and let it close while you stand clear of the swing.
Use what you see to narrow down the next step:
| What the door does | What to check first | What that tells you |
| Closes too quickly through most of its swing | Sweep or main closing speed | The main closing movement may need slowing |
| Closes very slowly through most of its swing | Sweep speed, after checking for rubbing | The main speed setting may need adjustment |
| Moves normally, then slams near the frame | Latch speed | The final closing movement may be too fast |
| Stops short of latching | Hinges, strike, seals, and rubbing points | A mechanical obstruction can look like a closer problem |
| Opens too abruptly near the end of its travel | Backcheck and suitable door-stop hardware | Opening control and the travel limit need separate checks |
| Closes differently from one cycle to the next | Leaks, loose hardware, or damage | Further valve adjustment may not solve the fault |
Adjust one setting at a time. If the sweep is working properly and only the final movement is too fast, there is no reason to change every setting.
Not sure which arm style you’ve got? Check our guide on types of surface-mounted door closers shows them side by side. Replacement bodies are in surface-mounted door closers, and parts for hidden units are under overhead concealed closer accessories.
Before Adjusting a Door Closer, Check the Door
Move the door slowly by hand, without disconnecting the closer arm. Some resistance from the closer is normal. Look for scraping, catching, or a sudden increase in resistance as the door reaches the frame.
Check the hinges, latch, strike plate, threshold, and weatherstripping. A sagging door or a latch that misses the strike needs attention before you add closing force. Turning a speed valve does not repair those problems.
Inspect the closer body, arm connections, and mounting brackets too. Stop if the body moves against the door, an arm is bent, or oil is leaking. Use the manufacturer’s repair instructions and approved parts, or have a door-hardware technician assess the problem. Do not bend a damaged arm back into shape.
Have these items ready:
- The instructions for the closer’s exact brand and model.
- The correctly sized screwdriver or hex wrench specified in those instructions.
- A phone timer or stopwatch.
- A way to record which valve you adjusted, the direction, and the amount.
- Stable access equipment if the closure is out of reach from the floor.
Before touching a hydraulic valve: Do not remove it, force it tight, or back it out farther than the manufacturer permits. Small changes can have a noticeable effect. Keep the arm attached and the hydraulic body sealed.
Where Are the Door Closer Adjustment Screws?
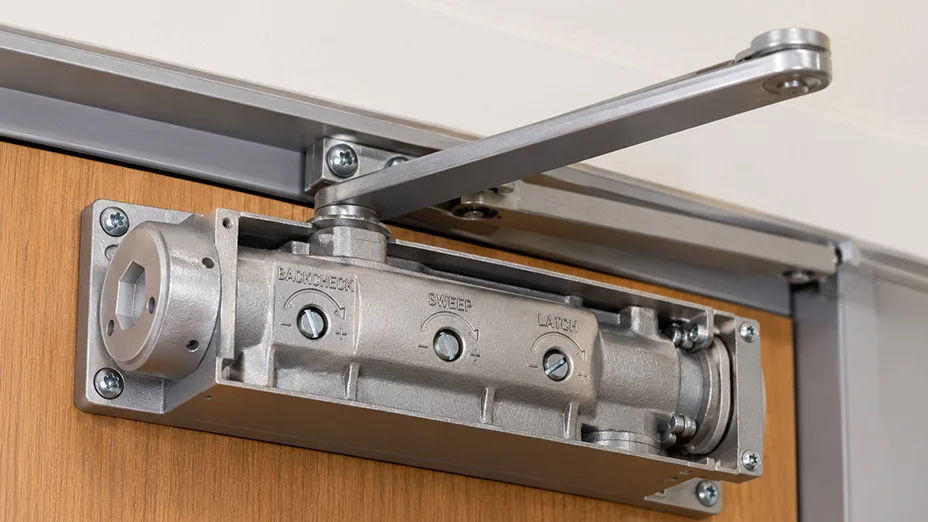
On many surface-mounted closers, the adjustment valves sit on the side or end of the body. A decorative cover may hide them. Follow the instructions for removing that cover, since some use clips and others use screws.
The controls may have letters, numbers, or words beside them:
| Control | What it changes |
| Sweep or main closing speed | How quickly the door moves through most of its closing swing |
| Latch speed | How quickly the door moves through its final approach to the frame |
| Backcheck | Resistance during the later part of the opening swing |
| Delayed action, where fitted | How slowly the door moves through an early part of the closing cycle |
| Spring power, where adjustable | The force available to close the door |
Do not identify a valve from its number alone. The same number can mean something different on another closer. Match the controls to the model diagram before making a change.
Not every closer has all five adjustments. Spring power may be fixed, and delayed action is an optional feature on many product lines.
How to Adjust Door Closer Speed?
The sweep valve controls most of the closing movement. Use it when the door closes too quickly or too slowly before reaching the latch zone.
- Identify the sweep valve. Check the model instructions rather than guessing from its position.
- Record the starting setting. Track each change so you can reverse your own adjustment if needed. Do not reset the valve by winding it fully in or out.
- Make one small change. On many hydraulic closers, clockwise slows closing and counterclockwise speeds it up. Confirm the direction for your model. If its instructions permit, start with about one-eighth of a turn, or a smaller change if specified.
- Test the door. Open it to the same position, release it, and watch the full closing cycle.
- Repeat only if needed. Keep within the model’s adjustment limits. Once the main swing is controlled, check the final approach separately.
If turning the correct valve produces no predictable change, stop. Continuing to turn it risks damage without fixing the underlying problem.
How Fast Should the Door Close?
The door should close at a controlled pace and latch reliably without a hard impact. There is no single closing time that suits every opening.
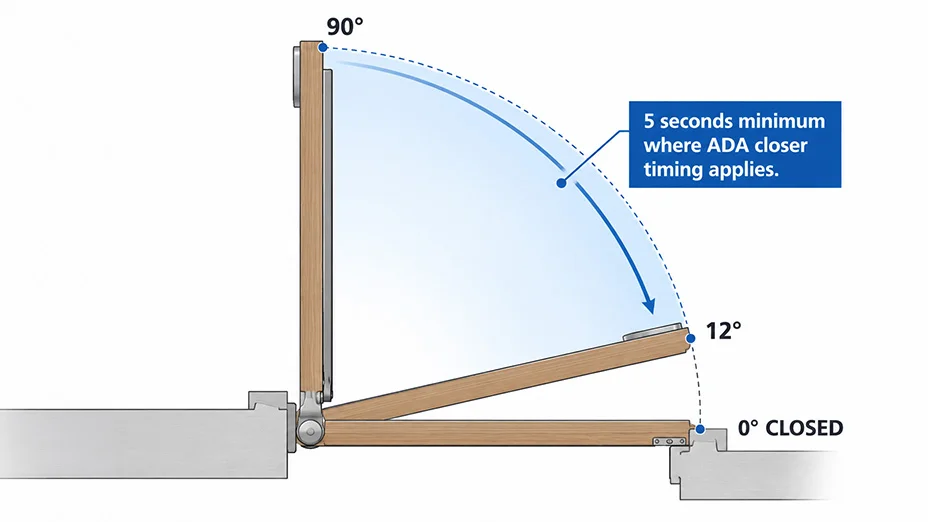
For doors subject to the ADA closer-timing requirement, the U.S. Access Board specifies at least five seconds from 90 degrees open to 12 degrees from the latch. This measures a defined part of the swing, not the total time until the door is fully shut. The requirement does not set a seven-second maximum.
Use a timer to check that interval. For a required accessibility check, have the angles and opening force verified properly rather than judging compliance by eye. Other building and local requirements may also apply.
How to Adjust Door Closer Latch Speed?
Latch speed controls the door’s final movement toward the frame. It changes movement speed, not the spring’s closing force.
If the door slams only at the end, work on this setting after confirming that the main swing is controlled.
- Find the latch-speed valve in the model diagram.
- Check the adjustment direction. On many models, clockwise slows the final movement and counterclockwise speeds it up.
- Make a small permitted change. Use the same careful approach as for sweep speed, recording each adjustment.
- Release the door and watch the latch. It should engage without the door banging into the frame or needing a push.
- Run several closing cycles. If the door now stops short, reverse your last change and inspect for resistance before continuing.
The latch zone often covers roughly the last 10 to 15 degrees, but the exact range depends on the model. The best result is reliable latching without a hard impact. The final movement does not always need to be slower than the sweep.
If the door still fails to latch within the permitted valve range, stop adjusting speed. Check the door fit, spring setting, and pressure conditions instead.
What If the Door Still Won’t Latch?
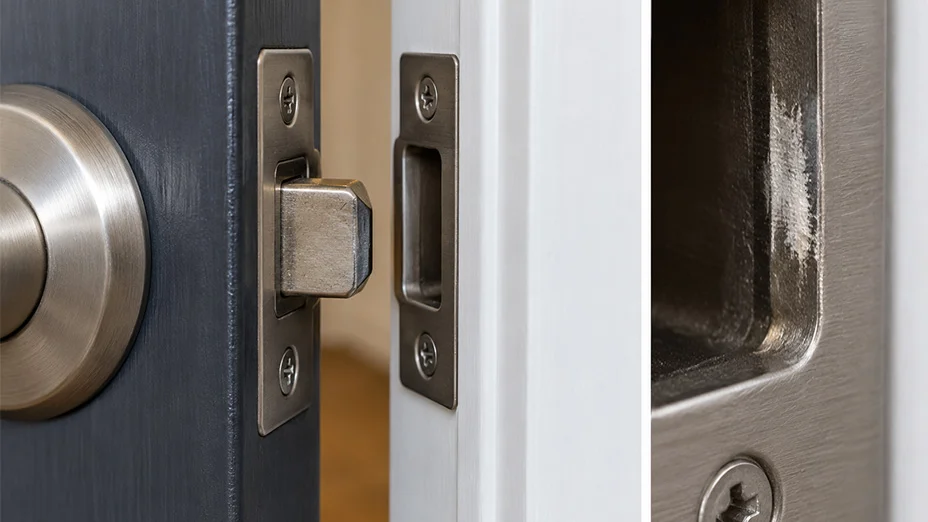
Close it slowly by hand and watch what happens as the latch reaches the strike. If you need to lift, push, or pull the door into place, address that problem first.
Look for loose or worn hinges, contact marks on the frame, a latch that catches the edge of the strike, and weatherstripping that blocks the final movement. Avoid increasing spring power just to force the door past an obstruction.
Wind or a pressure difference between rooms can also affect closing. If the problem changes when an exhaust fan runs, that is a useful clue for a technician. The solution may involve the HVAC system, door fit, or closer selection rather than another speed adjustment.
How to Adjust Backcheck and Spring Power?
These settings solve different problems. Only adjust them when the symptoms and the model instructions call for it.
Backcheck Controls the Opening Movement
Backcheck adds resistance during the later part of the opening swing. It cushions a door pushed open sharply or caught by wind.
Find the backcheck control and follow the model’s adjustment directions. On many models, clockwise increases resistance. Make a small permitted change and test the opening movement. Avoid an abrupt, hard-to-push opening action.
Backcheck is not a door stop. If the door needs a fixed opening limit to protect a wall or nearby object, use suitable stop hardware. Increasing backcheck does not replace that hardware.
Spring Power Controls Closing Force
Door closer “tension” usually means spring power. On an adjustable-power closer, increasing it provides more closing force and also makes the door harder to open.
Before changing it, confirm that the door moves without catching and that the closer’s size and installation suit the opening. Follow the manufacturer’s spring adjustment chart. Hydraulic valve increments do not automatically apply to the spring adjustment.
After a spring change, recheck closing speed, latching, and opening effort. Accessible doors may have opening-force limits as well as timing requirements. For example, the ADA specifies a five-pound maximum for applicable interior hinged doors other than fire doors, with different provisions for fire doors. A timing check alone does not establish compliance.
If the door only latches with excessive opening effort, have the installation assessed. DK Hardware’s door closer size guide can help you understand sizing before comparing replacements.
When Should You Stop Adjusting the Closer?
Stop if oil appears, hardware moves, a valve becomes difficult to turn, or adjustments stop producing predictable results. Also stop if you lose track of how far you have moved a valve.
A damaged arm may need a compatible replacement, while a leaking hydraulic body needs assessment for manufacturer-approved service or replacement. Do not open the body or attempt to refill it as a routine adjustment.
On a fire-rated door, preserve the assembly’s required closing and latching operation. Do not disable the closer or add an unapproved hold-open device. If ordinary permitted adjustments do not restore reliable operation, use a technician qualified to service fire-door assemblies.
When replacement is necessary, compare the mounting pattern, arm type, door width, spring range, and application. Browse door closers and accessories at DK Hardware, and check the product instructions before assuming the existing holes or arm will fit.
Door Closer Adjustment FAQs
Check the body, cover, and any available maintenance records for a brand, model label, or stamped identification. Photograph the closer and mounting arrangement for the manufacturer or a door-hardware supplier. Do not identify an unknown valve by turning it at random.
Temperature can affect some closers, but wind, seals, and building pressure can also change how the door closes. Inspect and retest before adjusting. Change only the affected setting within the model’s limits, then check operation again when conditions change. Some closers use fluid designed to reduce temperature-related variation.
Delayed action slows movement through part of the closing cycle. The door continues moving before normal closing resumes. A hold-open feature keeps the door at an open position. They are different functions, and neither should be assumed to exist without checking the model.
Use the storm door’s own instructions. Many tube-style closers have a single speed screw, while other storm doors use different systems. The controls, mounting adjustments, and test procedure may differ from the surface-mounted hydraulic closers covered here.
Check the Result Before You Put the Tools Away
Release the door from its normal operating position several times. It should close consistently, engage the latch, and avoid slamming or stopping short. Check that it still opens comfortably, and complete any required timing and force checks.
If those checks pass, leave the remaining settings alone. If they do not, record what you changed and address the unresolved fault before making further adjustments.